Vickers
Metal Testing > Hardness Testers > Benchtop
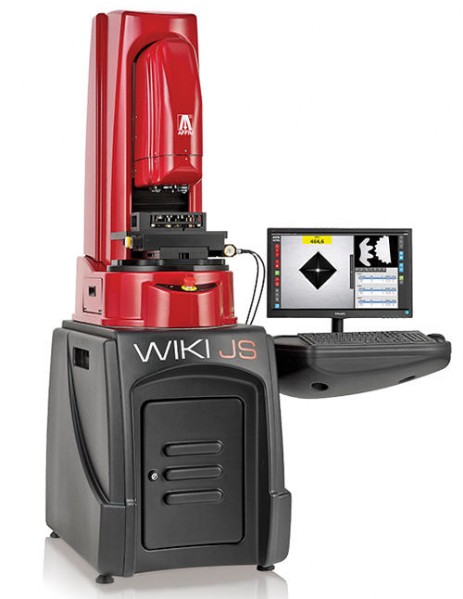
WIKI JS
Automatic Hardness tester for micro and macro Vickers, Knoop, Brinell and Rockwell test methods. WIKI JS is the top-of-the-line of automation and accuracy for Vickers and Knoop hardness measurements in compliance with ASTM and ISO hardness standards.
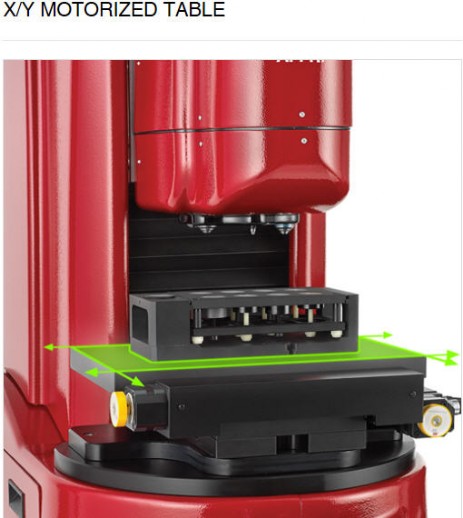
It is a fully motorized system for Case Hardness Depth test (CHD) on single or multiple samples in automatic cycle.
Everything is automated, freeing users for other tasks and minimizing subjectivity associated with human intervention.
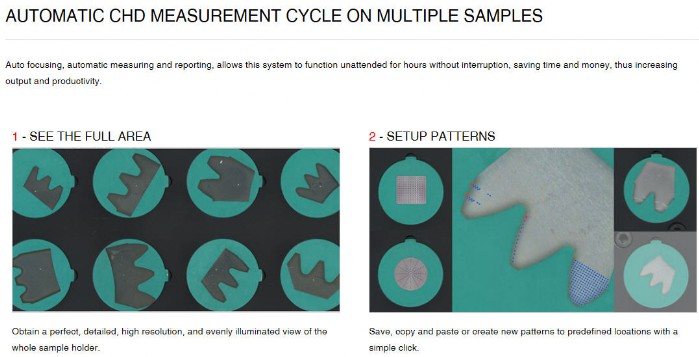
Just map-out indentation traverses where they are required, set the load and press START, the hardness tester intelligently follows the predefined patterns, indents the sample, focuses when needed, measures, and generates data dynamically.
Load forces are applied through load cells and electronically controlled in "Closed Loop" (Pat. AFFRI) with a frequency of 1 khz, assuring perfect linearity in every range, even on very low loads.
For micro-macro Vickers and CHD case depth tests on all metals: iron, steel, tempered steel, cast iron, brass, aluminium, copper and metal alloys.
Heat treatment, hardening, nitriding, cementation and hardfacing. Knoop test on ceramic and glass materials.
Test loads: from 1 gf to 100 kgf (0.0098 to 980.7 N)
TECHNICAL FEATURES | WIKI 100/200 JS | WIKI 100/200 JS3 |
Standards | DIN-EN-ISO 6506 / DIN-EN-ISO 6507 / DIN-EN-ISO 4545 / ASTM E-92 / ASTM E-384 / JIS B 7734 | |
X/Y table | WIKI 200 JS/JS2/JS3: Motorized - 100x60 mm or 200x100 mm with 0,5 µm step WIKI 100 JS/JS2/JS3: Manual - 100x100 mm with 10 µm step | |
Vertical head stroke | 0/300 mm Motorized | |
Depth capacity | 135 mm | |
Indent reading | WIKI 200 JS/JS2/JS3: Automatic or manual WIKI 100 JS/JS2/JS3: Manual focus with automatic reading | |
Force range | 0.09807 - 0.1471- 0.1961 - 0.2452 - 0.4903 - 0.9807 - 1.961 - 2.942 - 4.903 - 9.807 - 19.61 - 29.42 - 49.03 - 98.07 N (0.01 - 0.015 - 0.02 - 0.025 - 0.05 - 0.1 - 0.2 - 0.3 - 0.5 - 1 - 2 - 3 - 5 - 10 kgf) As optional: From 0.0098 to 0.09807 N (1 gf to 10 gf) From 98.1 to 490.3 N (10 to 50 kgf) From 490.3 to 980.7 N (50 to 100 kgf) 0.9807 - 1.961 - 2.942 - 4.903 - 9.807 - 19.61 - 29.42 - 49.03 - 98.07 - 196.1 - 294.2 N (0.1 - 0.2 - 0.3 - 0.5 - 1 - 2 - 3 - 5 - 10 - 20 - 30 kgf) | 0.09807 - 0.1471- 0.1961 - 0.2452 - 0.4903 - 0.9807 - 1.961 - 2.942 - 4.903 - 9.807 - 19.61 - 29.42 - 49.03 - 98.07 N (0.01 - 0.015 - 0.02 - 0.025 - 0.05 - 0.1 - 0.2 - 0.3 - 0.5 - 1 - 2 - 3 - 5 - 10 kgf) As optional: Superficial Rockwell 147.1 and 294.2 N (15 and 30 kgf) Brinell 306.5 N (31.25 kgf) |
Feasible tests | Vickers On request Knoop and Brinell | Vickers On request Knoop, Superficial Rockwell and Brinell |
Accuracy | Better than 0.1 % | |

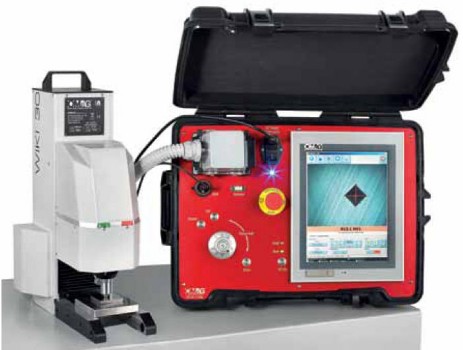
Portable solution - AFFRI® WIKI 30
Portable hardness tester for micro-macro Vickers and Knoop test methods, test loads from 0.98 to 1.961 N (0.1 to 30 kgf) in accompliance with ISO 6506 / ISO 6507 / ISO 4545 / ASTM E92 / ASTM 384 / JIS Z231 international standards.
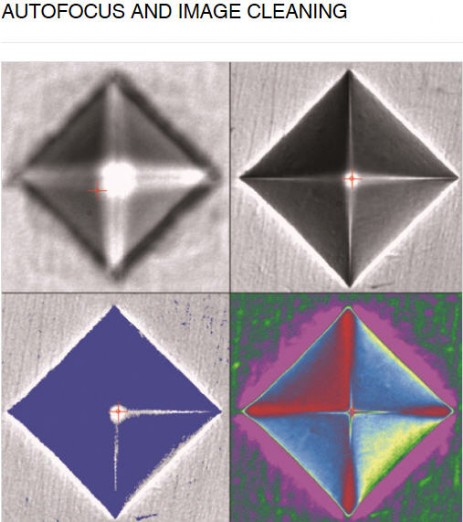
Automatic measurement system with autofocus and auto indentation reading.
Swivelling turret (Indenter and objective) with 5 mm of horizontal stroke to perform multiple indentations without moving the tester.
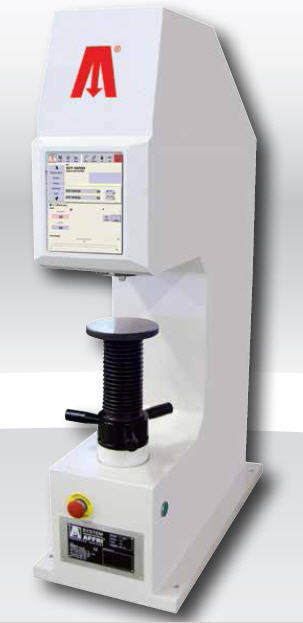
LD 3000 AF
Automatic hardness tester for Rockwell, Brinell, Vickers and CHD test methods in compliance with ASTM and ISO hardness standards.
The LD 3000 AF is built for measuring the thickness of the superficial hardness and will determine (CHD) Case Hardness Depth from 0.12 mm to 2 mm, with no need to destroy the specimen or to separate material types before performing the test.
With just one measurement it reduces hardness testing time and costs compared to traditional polished cross section of Vickers and knoop methods. Load forces are applied through load cells and electronically controlled in Closed Loop (Pat. Affri).
This hardness tester is entirely motorized and it is equipped with a wide touchscreen for ease in test planning and a clear view of results.
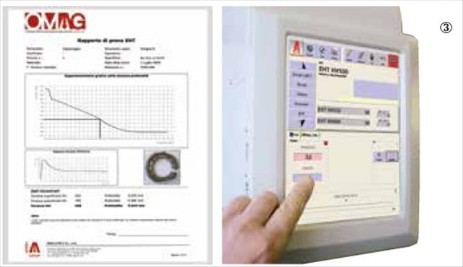
Statistics and CHD charts are automatically generated and can be stored with the test session in the large archive.
User friendly interface with conversion tables and round correction values for tests on covex cylindrical surfaces or various diameters.
For hardness case depth test with non-destructive method on all metals: Iron, steel, tempered steel, cast iron, brass, aluminum, copper and metal alloys.
Heat treatment, hardening, nitriding, cementation and hardfacing.
Test loads: from 10 to 3000 kgf (From 29,4 to 29403 N)
HDTL Method
Definition of the superficial hardness and its effective depth (CHD) from 0.12 a 2 mm. LD 3000 AF will determine the Case Hardness Depth (CHD) with great precision and minimal operator intervention, on finished products, without destroying the specimen and testing rather than random sampling of manufactured products. There's no need for sample preparation, no need to separate material types or to polish the cross section as in the Vickers method. In just one minute the tester generates the report with the CHD graph.
Easy and fast automatic measurements:
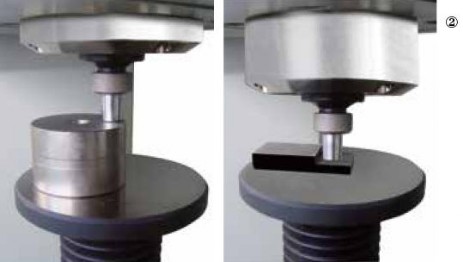
Spin the leveling screw handle until the sample makes contact with the clamping hood blocking the piece.
Press the START button and the measuring head will approach the specimen, apply the load to perform the indentation and goes back upward; all in automatic succession without breaching a phase.
When testing unstable samples or deflective parts, the AFFRI System will follow the sample and not lose contact, compensating any frame deflection during the test cycle.
Accurate results are assured even with oiled, dusty or dirty pieces.
Closed Loop (Pat. AFFRI)
The force by load cell and the closed loop AFFRI system assures absolute accuracy on all test conditions.
Closed Loop load cells manage load forces, which are automatically programmed and controlled at each test assuring perfect linearity in every range eliminating the problems associated with dead weight systems on traditional testers.
Results are not affected by any structural deflection, misalignment or vibration.
The system can also operate in an inclined position
TECHNICAL FEATURES | LD 3000 AF |
Standards | EN-ISO 6508 / EN-ISO 14577 / ASTM E-18 / ASTM E-384 |
Indenter and clamping-hood stroke | 30 mm |
Elevating screw stroke | 150 mm |
Depth capacity | 190 mm |
Test loads | Vickers: 98.07 - 147.1 - 294.2 - 490.35 - 980.7 N (10 - 15 - 30 - 50 - 100 kgf) Brinell: 98.07 - 153.2 - 294.2 - 306.5 - 612.9 - 1839 - 2450 - 4900 - 7350 - 9807 N (29403 N on request) (10 - 15.6 - 30 - 31.2 - 62.5 - 187.5 - 250 - 500 - 750 - 1000 kgf) (3000 kgf on request) Rockwell: 588.4 - 980.7 - 1471 N (60 - 100 - 150 kgf) Superficial Rockwell: 147.1 - 294.2 - 441.3 N (15 - 30 - 45 kgf) |
Feasible tests | HDTL con curva CHD: 525 - 550 - 600 - 650 (More on request) Vickers: HV10 - HV15 - HV30 - HV50 - HV100 Brinell HBWT: HB30 - HB10 - HB5 - HB2.5 MPa (F/D2) Rockwell: HRA - HRB - HRC - HRD - HRE - HRF - HRG - HRH - HRK Superficial Rockwell: HRN - HRT |
Accuracy | Better than 0.5 % |
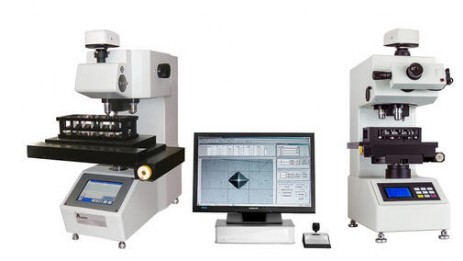
DM 8 / DM 2
Automatic dead weight hardness tester for micro and macro Vickers and Knoop method, single or multiple indentations.
DM8 and DM2 are low cost microhardness testers with high accuracy standards.
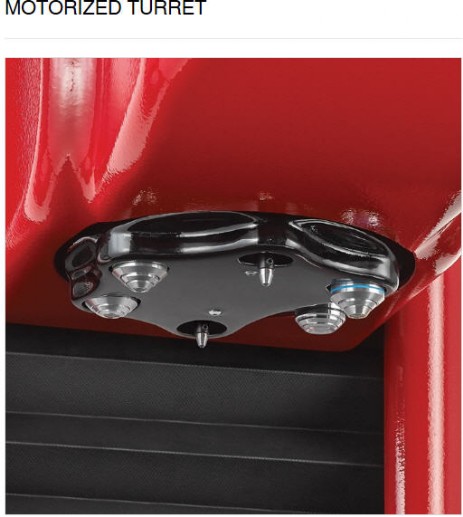
They are equipped with a motorized rotating turret with combined magnification lenses and indenters for reading and indenting.
For micro and macro Vickers and case depth test on all metals: Iron, steel, tempered steel, cast iron, brass, aluminum, copper and metal alloys.
Heat treatment, hardening, nitriding, cementation and hardfacing. Knoop test on ceramic and glass materials.
Test Loads: from 1 gf to 2 kgf (from 0,0098 to 19,614 N)

TECHNICAL FEATURES | DM2 Auto/Semi/Manual | DM8 A Auto/Semi/Manual | DM8 B Auto/Semi/Manual |
Standards | DIN-EN-ISO 6507 / ISO 4545 / ASTM E-384 / JIS B 7734 | ||
X/Y Table | Manual / Semi: Manual table 100 x 100 mm with 10 µm step Auto: Motorized table 100 x 60 mm or 200 x 100 mm (automatic) with 0.5 µm step | ||
Elevating screw stroke | 0/110 mm | 0/120 mm | |
Depth capacity | 0/70 mm | 0/160 mm | |
Turret (Indenter/Objectives) | Motorized - 4 slots | Motorized - 6 slots | |
Indent reading | Auto: Automatic focus with auto reading Semi: Manual focus with auto reading Manual: Manual focus and manual reading | ||
Test loads | 0.09807 - 0.2452 - 0.4903 - 0.9807 - 1.961 - 2.942 - 4.903 - 9.807 N (10 - 25 - 50 gf / 0.1 - 0.2 - 0.3 - 0.5 - 1 kgf) | 0.04903 - 0.09807 - 0.2452 - 0.4903 - 0.9807 - 1.961 - 2.942 - 4.903 - 9.807 N (5 - 10 - 25 - 50 gf / 0.1 - 0.2 - 0.3 - 0.5 - 1 kgf) | 0.0098 - 0.0294 - 0.04903 - 0.09807 - 0.2452 - 0.4903 - 0.9807 - 1.961 - 2.942 - 4.903 - 9.807 - 19.614 N (1 - 3 - 5 - 10 - 25 - 50 gf / 0.1 - 0.2 - 0.3 - 0.5 - 1 - 2 kgf) |
Feasible tests | Vickers (Knoop on request) | ||
Accuracy | Better than 1 % | ||
CL series
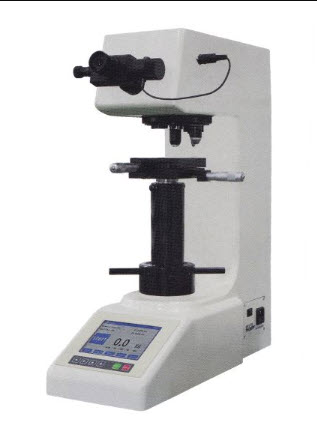
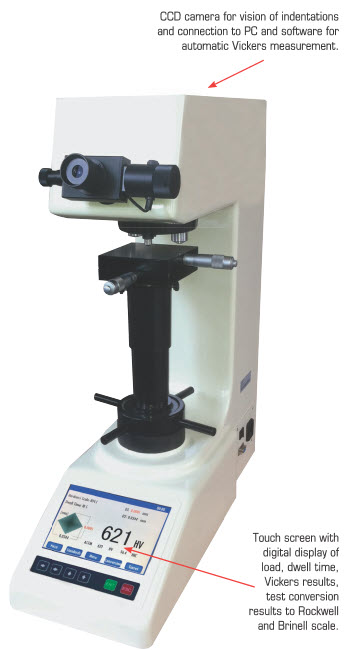
MICRO and MACRO Vickers HARDNESS TESTER CL series
In accordance with EN ISO 6507, ASTM E384 JISB7734 standards
Fully motorised load application controlled by only one key in the keyboard, pre-programmed constant speed of 50 µ/sec.
Load cell direct on the indenter and closed loop control feedback. It is no impact and no over load, no need to be levelled can work near to vibration source. Automatic turret with automatic contact of indenter / objective (3 steeps)
LED display to show the selected load, loading time, Vickers result,
Adapt to receive CCD camera or photo camera.
Max. height 170 mm
Max. depth 130 mm
Power supply 220v
CL5D: 0,3-0,5-1-2-2,5-3-5-10kg
Standard accessories :
Nr. 1 Objective 10x ( 100 x Magnification
Nr. 1 Objective 20x ( 200 x Magnification)
Nr. 1 Electronic eyepiece 10x with linear optical electronic scale high definition division 0,1µ 0,5 HV for loads 10-1000gr.
Nr. 1 User manual
Nr. 1 Connection cable 220V
Nr. 1 Calibration certificate traceable to SIT.
Nr. 1 RS232C out put data - USB Interface

