0/45 - Senze-Instruments Benelux

Senze-Instruments BENELUX
Go to content
Process & Quality Control

0/45

Coatings & Industry > Color > Portable
Erichsen Color and Gloss Unit SPEKTROMASTER 565-45

for simultaneous measurement of color (geometry 45/0, aperture 11 mm) and gloss (geometry 60°, aperture 5 x 10 mm) in accordance with DIN, ISO and ASTM.

Purpose and Application
The overall appearance of a product is influenced by color and gloss. A sample of the same color but higher gloss level is visually perceived darker and more saturated than a low gloss sample. In order to get a uniform appearance, both attributes need to be controlled.
With the new SPEKTROMASTER you can measure any color: dark - brilliant - steep reflectance curves.
The 10 nm spectral resolution not only ensures highly precise color results, but also an excellent agreement with competitive color instruments - even bench-top units.
The Spectrometers of the very most other suppliers are only able to measure the color value.
In comparison with this, the SPEKTROMASTER 565 is able to measure color and gloss both simultaneously!
Thus, the cause of a mismatch can be clearly defined in any situation.

  • Color and 60° gloss are displayed at the same time
  • In compliance with international specifications
  • Tolerances for color and gloss allow quick pass/fail decisions in production

45°/0° For measurements due to the allusion to a visually valued impression.
Also for a lot of Automotive relevant applications as well as oftentimes for measurements within the final inspection.
        
Specifications 1

Color
Spectral Range:          400-700 nm, 10 nm resolution
Repeatability:            0,01 ΔE*, 1 σ  (10 consecutive measurements on white)
Reproducibility:         0.2 ΔE*, 1 σ (average on 12 BCRA II tiles)
Color Systems:           CIELab/Ch;  Lab(h); XYZ; Yxy
Color Differences:   YIE313; YID1925; WIE313; CIE; Berger; Color strength; Opacity; Metamerism
Illuminants:                  A; C; D50; D55; D65; D75; F2; F6; F7; F8; F10; F11; UL30
Observer:                      2°; 10°

Gloss:                              0 - 100 GU
Repeatability:           ±0.2 GU
Reproducibility:       ±1.0 GU
Specifications 2

Memory:                1500 Standards;  999 Samples

color :                       geometry 45/0 :  aperture 11 mm
gloss :                       geometry 60°, aperture 5 x 10 mm

Languages:            English; German; French; Italian;Spanish; Japanese;Chinese
Power Supply:    4 AA alkaline; NiCd or MH batteries
Operating Temperature:  10 °C - 42 °C
Humidity:              < 85% relative humidity, non-condensing / (35 °C)
Dimensions:         9.5 x 8 x 18 cm
Weight: (complete scope of supply) approx. 2.5 kg

True circumferential illumination for best repeatability on textured samples.
The key criterion for a 45/0 instrument is a circumferential illumination. The SPEKTROMASTER 565/45 is using a unique, patented measurement principle to achieve a 100 % circumferential illumination. A white coated hemisphere acts as a mixing chamber and guarantees completely uniform illumination. Thus, any influence of measurement direction is eliminated and excellent repea ta bility
even on highly textured surfaces is guaranteed.


Standards
                
                    
  • ASTM E 308
  • ASTM E 1164
  • ASTM D 2457
  • ASTM D 523
  • ASTM D 2244
  •                 
  • DIN 5033
  • DIN 67530
  • DIN 5036
  • DIN 6174
  •                 
  • ISO 2813
  • ISO 7668
  • ISO 7724
  •             
Order number: 101-0287.01.31                               
        
The scope of supply includes:
  • black calibration standard,
  • white calibration standard with certificate,
  • green checking reference, high-gloss standard,
  • sample area locator,
  • software easy-link,
  • interface cable,
  • AA batteries (4 pcs.),
  • hand strap,
  • carrying case
  • and operating instructions.

Software easy-link
No matter whether you want to compare a batch to a defined standard or monitor process changes over time, easy-link, included with SPEKTROMASTER 565, offers all of the necessary tools (Hardware Requirements: Operating system Windows® 95 or higher Microsoft Excel® 97 or higher, including VBA - Visual Basic for Applications; Free Serial Interface).
Direct data transfer from the instrument into predefined QC templates make you ready for routine color control.
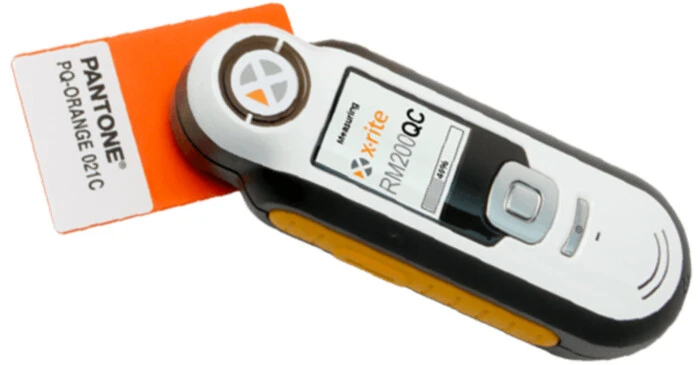
X Rite CAPSURE™ RM200QC  Portable Spectrophotometer

Overview
The X-Rite RM200QC Imaging Spectrocolorimeter is a handheld unit that simplifies color measurement from incoming material to outgoing product shipments.
It is designed to provide stable color comparisons for materials and products wherever color control is important.
It is an elegant, portable instrument that fits comfortably in your hand or pocket to take with you wherever you go – from the quality control lab to the manufacturing floor to supplier inspections in the field.

Key Benefits
The X-RiteRM200QC, is an handheld spectrocolorimeter that provides an inexpensive yet powerful way to record and communicate color difference to speed introduction of new products and reduce instances of scrap.
It simplifies how textiles, coatings, plastic molding and other industries can compare color parts in production with set standards, and then create reports.
When color requirements are stringent, relying solely on visual evaluation and comparison to physical color swatches can be problematic, as they can be damaged or deteriorate over time.
In addition, since everyone sees color differently, and color perception is affected by lighting and other conditions, using a color measurement instrument, such as the affordable RM200QC, removes uncertainty and boosts color quality.
The RM200QC was specifically designed with quality control professionals and production managers in mind.
• Simply upload Pantone, Munsell or any other standards, set tolerances, and quickly see pass/fail indicators when measurements are taken, taking the emotion out of color evaluation and speeding customer approvals.
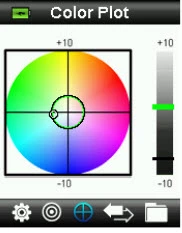
• Create and store up to 30 standards using the averaging function for highest accuracy.  An easy-to-understand color plot shows the difference between the standard and the sample being measured.
• Eliminate issues related to staff experience; everyone uses the same convenient, reliable device with an easy pass/fail indication based on approved standards.
• Use the RM200QC to control variations between lab formulation production and final goods, including control of batch-to-batch variations during the manufacturing process, reducing waste and rework.


Technical Specifications

Measurement time:           1.8 seconds
Operating Temp:                  0° to 40°C
Storage temp:                        - 20° to 60°C
Humidity Range:                  20 - 80% RH (non -condensing)
Usage:                                         Indoor use only
Altitude:                                    2000m
Pollution Degree:                  2
Transient Overvoltage:      Category II

Measure button : Two stage button;
  • press lightly to start preview and firmly to measure.
  • Lightly pressing this button always returns you to the Color QC screen.

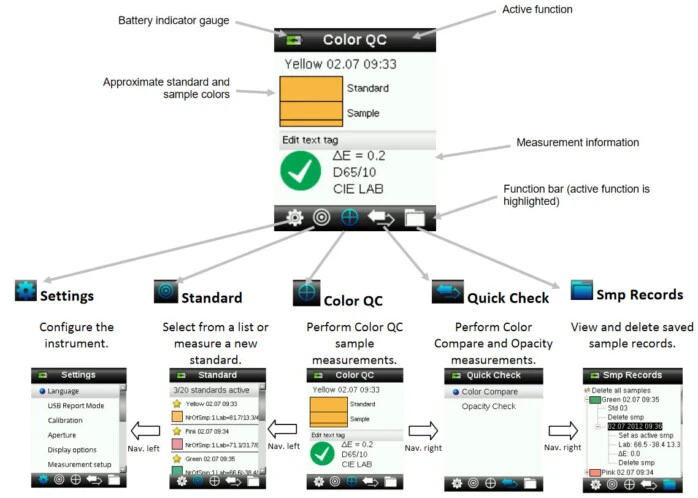
Navigation control :  Navigates the on screen menus and function bar in four directions

USB connection :  For charging the battery and interface to the software.

Speaker and Microphone: For recording and playback of voice tags.

White Reference slider: Positions the calibration tile for measurement or calibration/storage.

Two measurement areas are available:
  • Small (4 mm aperture)
  • Large (8 mm aperture)

EASY TO USE :

To measure a sample ,
1. Place the instrument flat against a sample with the center of the sample positioned under the measurement optics.
2. Lightly press the Measure button to enable an on screen preview of the sample for fine positioning.
3. Hold the instrument steady and press the Measure button firmly and release . An audible “camera-click” sound indicates the start of the measurement. A progress bar appears at the bottom of the display to indicate the measurement status.
4. It is important that the instrument is held steady for the duration of the measurement.
Sample information appears in the display after the progress bar reaches 100% .
Horizontal, vertical, and angled orientations are acceptable as long as the instrument makes good contact with the sample.
When the m easurement is complete, sample data appears in the display.
Depending on the Display options selected , additional sample view s   can be displayed and selected using the Navigation control .

The RM200QC can store a maximum of 20 standards with L*a*b* data
When a standard is measured, the instrument automatically assigned it a generic color name that can be changed.
More than one standard can be set active (star icon) to allow the instrument to automatically selected the closest standard during a Color QC measurement. The tolerance assigned in the Settings   menu applies to all stored standards.
The tolerance option is used to set the global tolerance for all standards and samples.

Up to 350 sample measurements can be saved with optional voice and text tags assigned to each.

The Quick Check menu contains functions which allow you to make quick comparison measurements that are not stored to the instrument.
The following functions can be selected from the menu.
-  Color Compare is a quick function to measure a standard and then a sample and display results.
-  Opacity Check displays the percent opacity of a drawn down sample on an opacity card
The Color QC menu is used for sample measurement comparisons against the selected standard(s).
Each measured   sample can have a text or voice tag applied. Refer to Saving a Tag with a Measurement for the procedure.
The following display methods can be used to view measurement data.
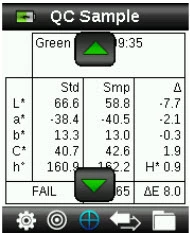
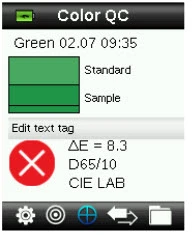
-  PASS/FAIL indication based on tolerance setting
-  Standard/Sample L*a*b* C*h° absolute and difference values
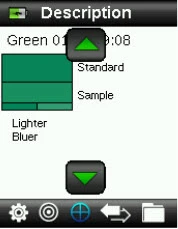
-  Color swatches with verbal description indication
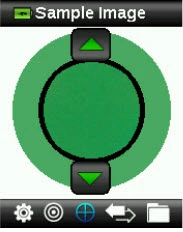
- Sample image
-  L*a*b* Color plot
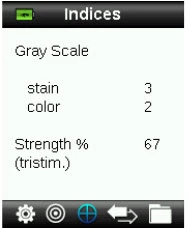
-  Gray Scale comparison of standard V sample and Strength calculation using tristimulus


USB Report Mode
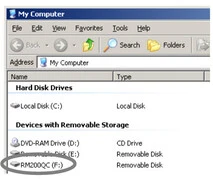
The USB report mode option is used to set the device USB mode for output of reports to computer. When the device is in this mode, it will work with your computer with similar function to a USB memory stick.


Two report options are provided:

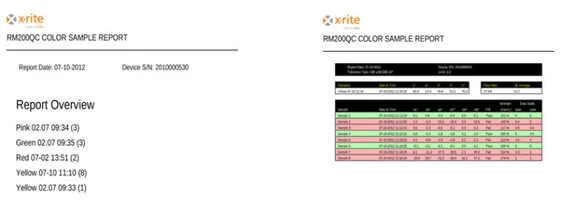
• QCREPORT.PDF: This provides a multipage formatted report ready for you to use directly for your quality records


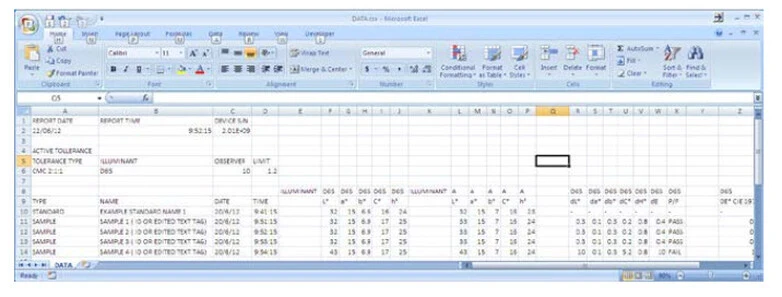
• DATA.CSV

This provides data for the measured standards and samples that is easily manipulated in Excel to a format of your preference, or for more advanced data collection and analysis.

Unplug the USB cable from the device to exit from the USB Report Mode
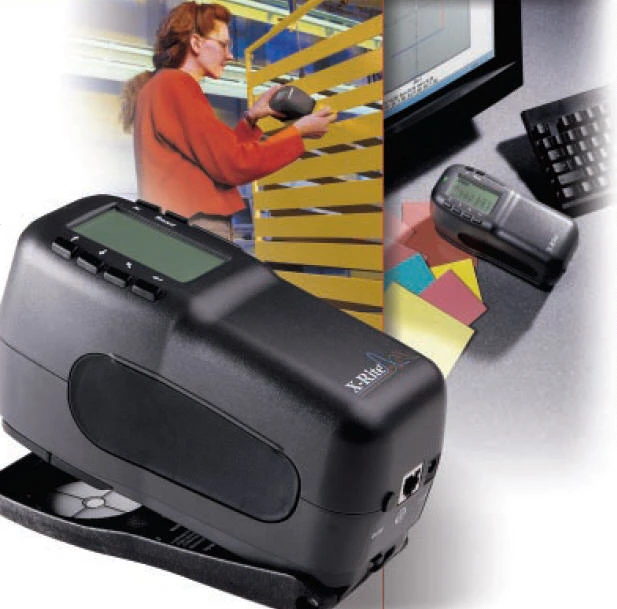
962 & 964 0°/45° Portable Spectrophotometer
The 962-964 Portable 0/45 Spectrophotometer allows you to obtain absolute and difference measurements in the lab, plant, or field for a wide range of colorimetric systems.
Accurate Color On the Go

The 962 portable handheld 0/45 spectrophotometer is a convenient color measurement instrument that allows you to obtain absolute and differential measurements in the lab, plant or field for a wide range of colorimetric systems. It is ideal for distributed workgroups whose members have varying requirements and skill levels but who must deliver color consistency across the supply chain.

The X-Rite 962 features an easy-to-read graphical LCD display and a pass/fail mode that measures against up to 1,024 standards with tolerances that can be stored for easy pass/fail measurement. Its unique Project Mode enables the collection of multiple color standards under an identified project as part of a corporate color standards program. The 962 is available in three models, distinguished by their measurement area: 962 (7mm), 962S (4mm), 962L (15mm).
Benefits:

  • The 962 is easy to read and easy to use, regardless of the skill level of the operator. Its Pass/Fail mode is a fast way for users to evaluate color accuracy against an established standard.
  • The 962 captures color data that helps identify variation in incoming materials, production batches and more, reducing the color approval cycle and speeding time to market.
  • Its wide colorimetric range meets a number of CIE certifications and includes CIE XYZ, CIE Yxy, CIE LAB, Hunter LAB, CIE LCH, CME, CIE94, Whiteness and Yellow.
  • When paired with Color iQC or Color iMatch software, the 962 offers increased control over QC and color formulation activities.
  • When used with X-Rite NetProfiler, a cloud-based blend of software and color standards for verifying and optimizing performance of color measurement devices, variance among instruments used in various parts of the color workflow is reduced.
Features :

  • 0/45 optical geometry
  • 0.15 delta Eab inter-instrument agreement
  • JOBS and PROJECT operation modes
  • Opacity and color strength measurement
  • Reflectance curve graphics display
  • Flip-back target shoe for flexible use
  • Rugged construction
  • Rechargeable battery for remote use
Specifications 1

Short Term Repeatability - White : 0.10 ΔE*ab on white ceramic (Standard deviation)
Measurement Geometry : 0/45°
Inter-Instrument Agreement : 0.20 ΔE*ab avg.
Illumination Spot Size : 21.5mm or 9mm or 6.5mm
Lamp Life : Approx. 500,000 measurements
Light Source : Gas-filled tungsten lamp
Measurement Cycle Time : ≈ 2 seconds
Measurement Spot : 15mm or 7mm or 4mm
Measurement Time : ≈ 2 seconds
Photometric Range : 0 to 200%
Photometric Resolution : 0.01%
Spectral Analyzer : Blue-enhanced silicon photodiodes
Spectral Interval :10nm
Spectral Range : 400nm-700nm
Spectral Reporting : 10nm
Color Spaces : CIE XYZ, CIE Yxy, CIE LAB, Hunter LAB, CIE LCH,
Illuminants : A, C, D50, D65, D75, F2, F7, F11 & F12
Observers : 2° & 10°
Reflectance Aperture(s) : 1
Specifications 2

Humidity : 5% to 85%, non-condensing
Operating Temperature Range : 50° to 104°F (10° to 40°C)
Storage Temperature Range : '-4° to 122°F (-20° to 50°C)
Dimensions (length, width, height) : 19.6 cm, 8.4cm, 10.9cm
Weight : 1.1 kg
Package Dimensions (length, width, height) : 36cm, 30cm, 20cm
Shipped Weight : 4kg
Communication Interface : RS-232
Instrument Display : Graphic LCD
Languages Supported : English, German, French, Spanish, Italian, Portuguese
Software Development Kit : XDS4
Voltage : 100-240VAC 50/60Hz, 12VDC @ 2.5A
Sample/Measurement : 1024
Standards : 2000
Calibration : White, Zero, UV
NetProfiler Support : Tethered
Sample Preview : Targeting window
Warranty : 12 months
Back to content